Editor
Sorting
Timelines can be sorted one of three ways: how they were originally written (default), ascending, or descending. Event groups will be sorted internally and then they themselves sorted based on their collective earliest and latest dates.
Drag and Drop
If you find yourself not wanting to edit the text of the timeline or just have some quick edits to make, you may find the drag and drop option to be helpful for you. You can edit the start and end times for an event, as well as moving it forward or backward in time.
This setup works well when sorting, as events will automatically move themselves to the correct order after they've been edited.
Editing from the timeline
Basic editing of events can be done from the timeline view. Edits made in the timeline will be reflected back to the text editor. Currently, events can be resized (start and end dates can be moved) or moved up or down (that is, appearing before or after other events in the timeline). Events can also be created from the timeline view, by hovering over the new event button and clicking and dragging to the desired start and end dates for your event.

Note that the interpolated events' date formats will be inferred from the date formats of already defined dates, otherwise it will default to EDTF. So, if you want to create an event with the format m/d/y from the timeline by dragging the new event button, you should already have an event defined that uses that format.
Saving and sharing
To save a markwhen document, click the Save locally button from the File menu while on the Editor tab of the sidebar. It will be saved locally in your browser, and you can come back and edit or view it later, as long as it's on the same device.
Sharing
Custom url
To share a markwhen document with a custom link like /jeff/mylife, and to be able to edit it later, you will need to make an account. You can make an account by sending yourself a signin link from the profile page. Once signed in, you will need to choose a username from which your markwhen documents will be hosted. For example, if you choose the name jeff, all your markwhen documents will be accessible from https://markwhen.com/jeff/.... If you share a markwhen document with the same name as your username, it will be accessible from https://markwhen.com/[your username]/, otherwise, it will be accessible from https://markwhen.com/[your username]/[markwhen name].
All in all, the steps are:
- Send yourself a signin link.
- Click the link to login.
- Choose a username - all your shared timelines will be available from
https://markwhen.com/[your username]/... - Share your markwhen page
Access control
Specify who can view your shared timeline by adding a view field to your header:
// Only allow Jill and Corey
// to view this shared timeline
view:
  - [email protected]
  - [email protected]
This only affects markwhen documents shared on markwhen.com.
Importing
Similar to exporting a markwhen page, you can import a markwhen file from your computer or load one via a url. Note that the url should return raw text (either text/markwhen or text/plain), not html.
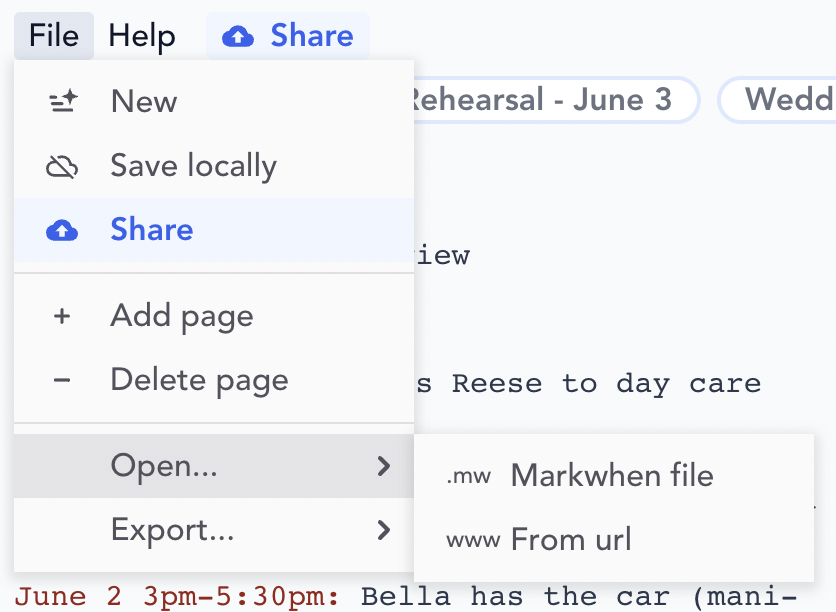
Importing from a url can also be done by appending a hash to markwhen.com of the form #from={url}. For example, markwhen.com/#from=markwhen.com/rob/wedding will load the markwhen file at /rob/wedding.